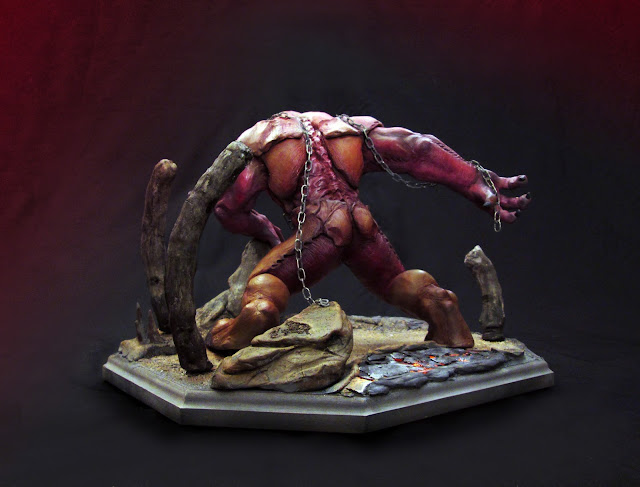
DOOM is back and the monsters looked awesome - so here's a sculpt of the Baron of Hell. The sculpture is made from Super Sculpey and painted in Tamiya acrylics. The base is made from MDF and the rock details are air dry clay over a tin foil armature. Skip to the bottom to see the final figure!
For this particular figure I really wanted to up my 'pose game' So many of my previous sculpts suffer from what I'd called a 'Just standing there dramatically' pose. What follows is the entire process. It isn't especially noteworthy from my previous work, but I've chimed in on a few things...
For this particular figure I really wanted to up my 'pose game' So many of my previous sculpts suffer from what I'd called a 'Just standing there dramatically' pose. What follows is the entire process. It isn't especially noteworthy from my previous work, but I've chimed in on a few things...
Progress shots

The standard tin foil bulked aluminum armature. This is in the rough pose and changes a bit as we start roughing out the shapes and balancing the pose out...
One thing of note, with most large super sculpey figures a strong armature is essential. In this case because my monster here is leaning forward a fair bit so he needed some extra support. I really should have made the armature much stronger as the entire sculpture ended up being a pretty heavy amount of clay - but it just about worked in the end.
The figure was baked without the head and hands which were added later - The head I wanted to sculpt hollow so I could get an LED in there later on. To make the head hollow I just removed the tin foil inside from the holes where the horns join the head after final baking.
Lookin' rather derp!
Final baking (above) You can see the holes where the horns join the head - this is where the tin foil was scooped out from.
If you look carefully you'll notice the right toe as a green/yellow ish seam. This is milliput - the toe developed a crack during baking and came off (oops). This is always scary but for the most part sculpey breaks fairly linearly and can be repaired easily.
The base
The base is cut from a sheet of MDF and then doubled up for thickness. This is then sanded and routed for finished edges. I then began adding rock detail with air dry clay. Also because the corners of my MDF was a bit knocked I decided to cut these off and have more of an interesting shape instead of a square...YAWN! | |
| my base detail 'plan' |
I sculpted the rocks with the sculpture in situ because I wanted him to be interacting with the base in someway - in this example he's holding onto a rock because he has had a few too many drinks.
Primed and ready - also visible are some clear acrylic sections under which I'm sticking some flickering orange LED's for lava. I also utlised a bathroom plug chain to make him look 'metal' and sprayed it a couple of times with a textured paint to make it look all rough and grimy. There's a rock on the left there which I ended up not liking so I didn't use it,
The base fully painted (nearly I guess) I used sand for texture and used a lot of washes and dry brushings of light browns and grey-browns.
For the surface of the lava I used the air dry clay again - but a thin layer of it, then smashed it up and glued it to the surface of the acrylic.
Finished Figure
Thanks for looking!


