Spirit Breaker was a fairly quick sculpt that I just hammered out so my progress photos suffered a little bit... what few there are of the sculpting process follows below!...
Tin foil face.
I made a conscious decision early on to use real fabrics in the final piece rather than try to sculpt them on - a vinyl leather effect table cover was used for the hard-looking leather bits and a rough nylon cloth was used particularly because the edges could be frayed.
For the shoulder armour I sculpted around some steel wire mesh for extra strength. As these pieces curved around I was able to bend the mesh to the right shape before sculpting.
To get a duplicate for the other shoulder a one part mould was made with tin-cure silicone.
These were then slush cast in stages until the right thickness was reached - I wasn't worried about a totally smooth underside as this would later be covered with fabric.
Then then it was painted in two stages with Vallejo model air. The first stage after priming was a base of light sand, then a coat of hairspray to seal and then the brown top coat. With the top coat dry I brushed the whole thing all over to show the undercoat. (The hairspray technique is great for weathering - I mentioned it before on my
Strider build -but there are many far more qualified perspectives from people on youtube!)
Holes were drilled into the FACE!! Ugghh! and shoulders to provide mounting points for the many many extra bits and pieces.
Base blues were added first - mixtures of Model Air light sea blue and Model Colour light sea grey and varying tones in-between for depth.
What's the difference between Model Air and Model Colour!?!?!
Model Air is pre-thinned for airbrushes, model colour isn't - but you can thin it yourself with alcohol based thinners or water.
Fabrics were added including a little sash with a brass ring (which I think is the hoop of a shower curtain) and glued together with a fabric glue. The leather-looking vinyl was scratched with a wire brush first to wear it a little.
YAHWHHN I hear you say, hold on there's a bit i've never done before coming up!
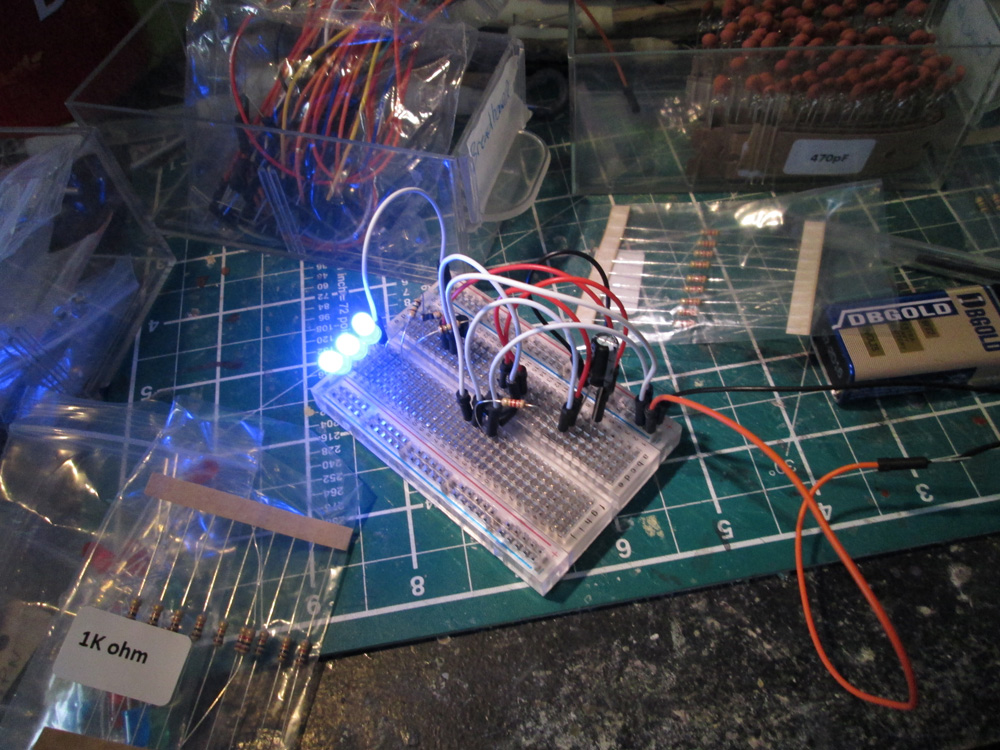
Flashing things!
I didn't want a flash I wanted a magical glow - I had no idea how to do
such a thing and spent a long time looking initially at programming an
arduino, having a custom IC made, researching pulse wave modulation
all these things I didn't understand.
The solution - happily -
was fairly simple in my case - it involves some basic electronic bits
and most importantly a 555 timer chip.
The tutorials on the
Instructables website was a great help here and I found exactly what I needed. All I did was make some alterations to resistor and capacitor values and change the amount of LED's
The speed on the dimming is controlled by certain values of resistors and you can make it faster or slower until eventually it's so slow it doesn't dim at all.
To house the electronics a channel was routed into the base. The LED's would spread along this section and the entire assembly would form a horseshoe shape. It looks like a mess of wires because it is.
A clear plastic sheet was sanded to frost it and was added on top of the base to diffuse the light.
To create the rocky ground - mounds of tin foil were glued to the surface.
Car-body filler was then coated over the whole thing - being sure to leave cracks for the light to shine through. After a few passes the surface was sanded to create a more rock-like surface and look less like a muddy swamp.
Then it was painted in various charcoal greys and dry brushed in light grey and white.
To see the dimming in action - see this video on my facebook page...
https://www.facebook.com/handmadebyradish/videos/vb.673822205971111/1015989021754426/?type=2&theater
Final Figure
Thanks for looking!