I post progress pictures on my facebook page sometimes - If it's something more current your after then why not take a look? facebook.com/handmadebyradish
Until some of the bigger things start showing their faces - here is a quick run down of a bust sculpt I did of The Mouth from Lord of the Rings. I don't think he was in the film? Or maybe an extended cut or something - but I thought he looked cool and I'd like to give it a shot.
The figure was sculpted in Super Sculpey (the regular one). In retrospect sculpting in something harder would have been easier - hard flat shapes on the mask were hard to achieve with such a soft clay. I've been using Monster Clay for some projects I haven't shown yet - that may have allowed me to lay down those shapes quicker.
Because the geometry of the mask was so tricky I didn't want to accidentally ruin my work when I started sculpting the fabric part which runs up either side of the mask - so I baked it to save it from my clumsy fingers and then sculpted the fabric part on top of it.
I was curious about baking Super Sculpey more than once - I thought this stuff was a one bake deal - but I've seen forums of people saying it can be done. I've baked sculptures twice on a few occasions now with no ill effects. I've read though that you can't re-bake indefinitely, there is a limit but I cannot say for certain what that is - I think it depends right?
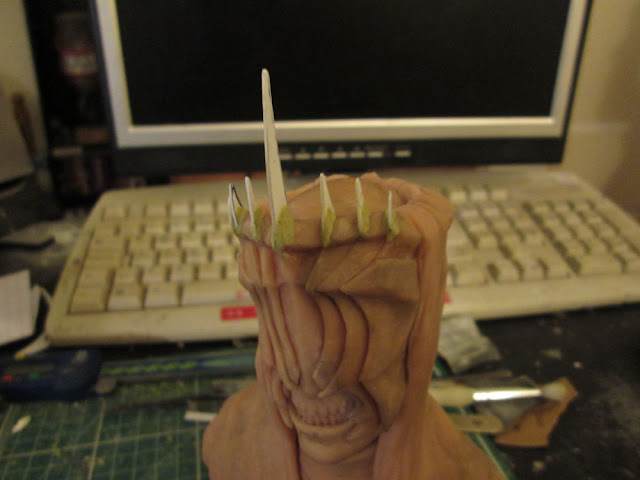
For the spikes of the mask I left grooves into which I lay some cut styrene sheet into and then blended the seams with milliput.
The paint job was something I wanted to experiment with - I wanted to mimic a stone sculpture. To do this I painted a mixture of greys and grey-greens of varying shades and then set to applying a clear cote. I purposefully over-applied this in areas so that it would crack and I could chip it away - you can see this particularly on the shoulders. It felt quite strange to mess up a paint job like this but it seemed to have the desired effect.
I used a range of dark washes, browns, greens for the grooves and sprinkled some plaster powder into some areas to give a rougher finish. Some final detail work was done by lightly splashing some white acrylic into some areas for a more mottled appearance.
The paint job on this figure gave me an insight on when to call it a day. I'll admit that I find myself almost over-painting some things - just adding a little bit more and more. Weathering is all about subtlety and so to is any kind of paint application where you're trying to mimic real life or semi-realistic creatures, it is easy to over do the detailing. I'm still learning this trait, but this particular piece is a good example of where I've seen the time to stop painting and put the brush down.
As I do more complex pieces I hope I'll see this more and more often - and that will be all for the better.


No comments:
Post a Comment