QUICK BUILD - TITANIC


I don't get too many chances to build regular model kits these days but I thought I'd set myself a fun challenge - buy a cheap model kit and build it in a day. After all my regular projects tend to last for months, it'd be nice to actually finish something in a timely fashion you know?


The Build


This model was smaller than I imagined. The box wasn't very big but I thought it would be taller. I'm glad it wasn't any bigger in retrospect - I'd still be making it now!

First step, gather the bits!


Sand away any pesky seam lines. Some models have it worse, This kit is a Revell Titanic and is pretty good really. Goodness I didn't want to be sanding seam lines all day anyway NO TIME!

Depending on how bad a seam line is - start with a rougher grit and finish off with a really smooth wet and dry paper.


In the booth for a spot of primer. From a can no less. No special paint has been used for this build. Basic System 3 acrylics were used for the detail washes and the parts done by hand. The bulk of the hull was done with standard colours from a can.


Looking okie dokie.


Ah, the front bit. Nothing weird going on here...


I wanted bigger funnels. Alas.


Here are the paints you get with the set. None of which are particularly useful. You may need to supply your own paint.


Bit of primer, bit of wonky plastic stuck on the end. The kit is what it is...


Painted with standard acrylics and a few washes (really watery paint) of various browns to get into all of those cracks and add depth.


Not too shabby...


Bit of assembly happening. No glue yet, it's good to make sure things fit right, these small / cheap plastic kits can be a bit warped sometimes - as mine was just a smidge.


Masking with Tamiya masking tape and sprayed again with a red and black - both from a can.


In the top right is a Tamiya weathering kit. It looks like a make up pad. I used this for little touches of dirt / metal on the funnels - these little weathering kits are great fun!


Starting to get some touches here and there and a touch of weathering...


So far so good - how about drilling some tiny holes for some lighting?  I used a hand-driven Archimedes drill for this - a powered drill spins tiny drill bits like this (0.5mm) far to fast and melt the plastic around the bit which results in a bigger hole then expected.

The lighting would simply be 3 white LED's wired together in series inside the hull. A hole at the bottom allows for a wire to come through it and into the base where the 9V battery will be.


Cotton wool and some string for some extra effects which may or may not be cheesy.  Notice the front section is bent up a little bit - this is that slight warping cheap figures can have sometimes - no matter though, some glue will sort that right out.

poooof


Iritatingly small masts... It was tricky finding string which was in scale with the rest of the figure - sometimes small models can be unintentionally scaled by elements which are small in real life but look massive in the context of the model.


Even more irritatingly small decals...


Getting there....


Ok - it looks alright, but it's missing some flair... how much time do we have?


Lets sink it!
For the base I cut some MDF and cut a void in one of the layers to position the model into.


The area around the void is painted lighter to give the impression of rushing water.


Outer areas are painted in dark blues and greens.


For the water a cheap silicone sealant commonly used for bathrooms and showers is squirted on and leveled off with a flat bit of wood. I did several layers of this for depth


that black nail is not nail polish it's paint ok!


The surfaces are roughed up a bit to add a bit of detail, particually around where the model will sit.


The model is then placed into the void and the gap around it is filled with silicone.


A bit of extra roughness is added with Deluxe Materials Making Waves - it dries clear.

Finished Figure


Thanks for reading / looking. Fancy having a go?

ODDWORLD - SHRYKULL


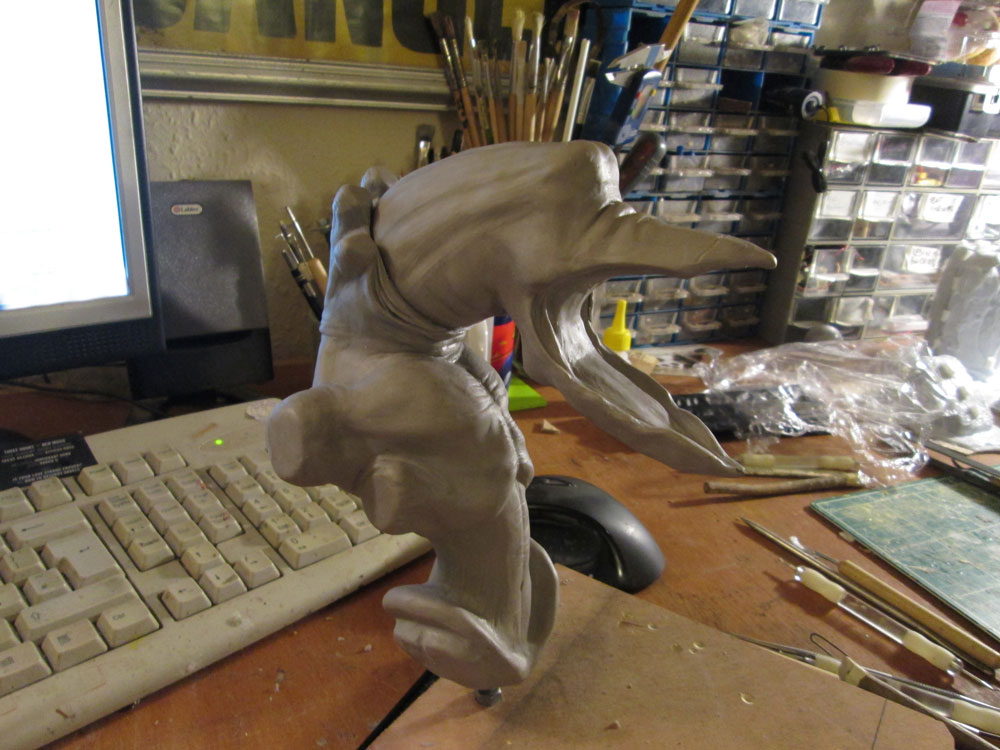
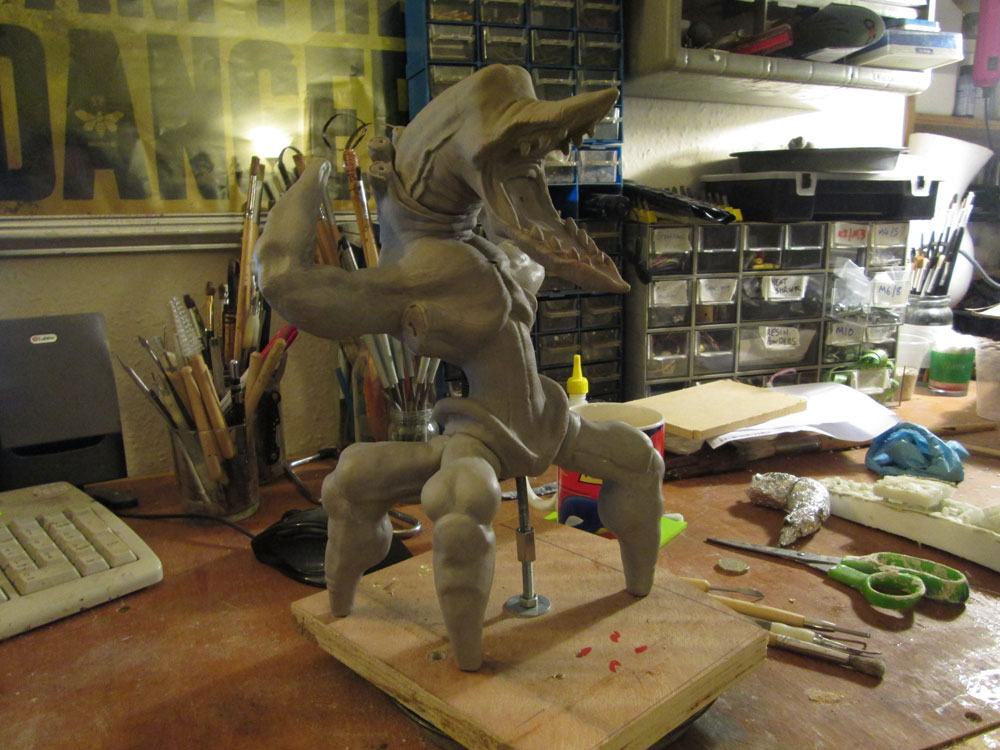
This is a sculpture that for the most part is a variation on one I'd done before - with a few mutant tweaks. I thought I'd take the opportunity to take what I learnt with Scrab and make a few changes to the skin texture and paint and try a few new techniques.


The Sculpting Process 


We start as we often do with a tin foil base made roughly to the shape we want it. The armature is a 6mm threaded rod screwed into some plywood - it's all removable so that the finished figure doesn't have a metal rod sticking out of its wotsit.


I'm trying a new material here (sort of). I'd heard tell of people mixing both regular and firm sculpey together to get a nice happy medium - something I've called Fiddy Fiddy (50:50). It has an added firmness that isn't hell on the hands and the grey colour which is so handy for spotting surface imperfections you'd miss in a pale pink clay like regular super sculpey.


Planning is important for a better future here - I need to know break points of a figure early on (where arms and legs attach to the body) and try to work these break points into the sculpt to hide the seams. A figure of this size with everything sculpted in one go would not fit in my oven!


After the bulk of the shapes are added and the proportions finalized, I start to move around adding wrinkles and skin textures. There are a great many ways to do this in clay. I used more or less the same technique as I did for rough skin in the previous Scrab figure. This time I stippled a few locations with a thick haired / rough paint brush and added little bumps of clay here and there for depth. Blending is often done with White Spirit - just a touch brushed over with a very soft brush to blend the edges of the strokes and hide the tooled effect.

Small sewing needles in various thicknesses are great for random/parallel skin lines.


For the finger parts I made the armature with a small amount of tin foil over the aluminum wire - just enough to give the clay something to cling to as I sculpted - there is also a thinner gauge wire wrapped around the armature for this purpose.


To make sure the seams between pieces were just right I tried a new technique and that is baking the two mating surfaces with a heat gun to set them in place. I've noticed sometimes pieces baked separately may change shape at the seam just enough to give you a hairline gap - it's irritating. I covered the parts I didn't want to bake with tin foil.

The heatgun method isn't a full bake - It's only on for a very short time - but it's enough to harden the clay just the right amount to stop the seams from changing.


For the legs I needed to raise the whole sculpture up so I could attach the leg pieces. To do this I attached a connecting nut to the bottom of my threaded rod so that I could lift it the desired amount with additional rod.


Everything is starting to come together!


To join the legs to the body, and to make sure they don't rotate or flop around, I used an aluminum strip as a connector - I could also have used a square rod but I didn't have one at the time.

The oven I use for baking is a simple halogen oven - available mostly everywhere. I bake it slightly longer than necessary and some pieces are baked more than once - see my bust of The Mouth for that.


chocolate fingers make everything better


Despite my dilligence with the seams some still needed a little tweak - particually the legs. For this I used a small amount of good ol' Milliput which I could pressed into shape between the two mating surfaces.


Painting and Finishing


For painting some things are held from my slightly dodgy string above my spray booth to get my grubby fingers off the pieces as I paint. I use a Hycote primer primarily because it's sold in a shop near me. It's pretty good.


At this stage the base is measured out - which is a couple sheets of MDF glued together for thickness. LED's were going into this base, so a central window was cut into two of the 3 layers to form a void where my electronics could go.


A couple of coats of white primer. I'm painting red onto this, so a light base makes all the difference.


He looks pretty orange in this shot - he's not It's my rubbish lighting.


Shrykull is a mutant right? A Scrab with unfortunate Paramite bits? I felt a few flashes of green near the tips would show a nice gradient of colour from one creature to the other.

I used Vallejo model air paint for this piece, sprayed from an airbrush. Finishing touches I tend to do by hand with some dark washes to bring out some wrinkles.


Standing! All by itself! I cut some circular grooves into the base with a Dremel sanding bit so that the legs could sit into the base securely without pins and not slide about like he's on roller skates or something.

I drilled a hole to nearly the size I needed it (I didn't have the right size drill bit) and then plunged the drum sanding attachment into the hole to make it the right size. The Dremel was not happy about that but we've talked it through - we cool.


The finished base, a mixture of car body filler, clear PETG plastic and some LED's. Painted with vallejo acrylc through an airbrush and finished by hand with a selection of washes and dry brushing.


The clear plastic allows some blue LED's housed inside to shine through.


And with that, it's photoshoot time...

Finished Figure


It was a fairly long but enjoyable road - I hope you enjoyed seeing the pictures of the progress - perhaps you'll want to give it a go? - grab some clay and get going!